Water is magic when it arrives at your feet as a soft spray, a shallow stream, or a sun-warmed mist. For families with kids who crave space to run, splash, and discover, a thoughtfully designed splash pad can feel like a private water park at home. Over the years I’ve built a few DIY setups, watched the weather be a constant variable, and learned where a project like this can soar and where it needs conservative planning. The goal is a backyard feature that is inviting, safe, and durable enough to handle week after week of summer life without becoming a constant headache. This piece blends practical know how with a bit of the craft person’s intuition, because a splash pad is as much about how you use the space as it is about the equipment you install.
The dream is a grand splash zone that fits your yard, supports your family’s routines, and ages well with your kids. You don’t need a full water park, but you do want a space that feels expansive, even when the neighborhood kids wander over after a rainstorm. The good news is that you can get a strong payoff for a thoughtful investment of time, planning, and a budget that matches your goals. Below I’ll share ideas that work in real life, with caveats from the field and a few tested tactics that save time and money.
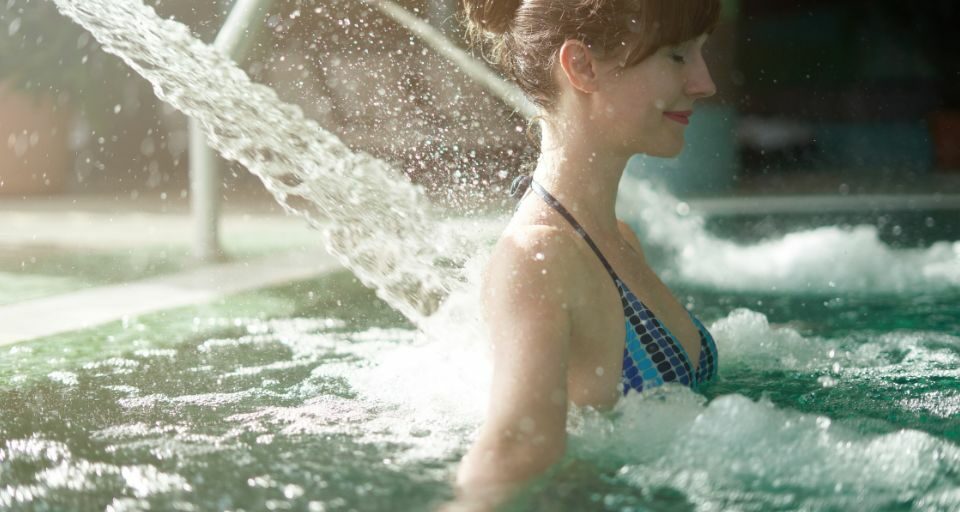
A backyard splash pad begins with a clear picture of use. Are Click to find out more you aiming for a constant spray for summer afternoons, a shallow pool that kids can wade in, or a sensory setup that invites curious toddlers to explore textures and patterns? The answers shape how you design, what you buy, and how you keep maintenance reasonable. In my own space, we built a multi zone pad that blends three kinds of water play: a sun warmed foam like sprinkle that kids orbit around, a gentle stream that runs along a low edge, and a mosaic of soft spray jets that give the sense of a dynamic water park without making the yard feel chaotic. The result is a space that invites passive use as well as active play, which is the mark of a well thought out backyard feature.
The foundation begins with a plan for drainage and surface. A splash pad is, in essence, a waterproof surface with water circulating beneath. The surface needs a reliable slope toward a drain so water doesn’t pool in the middle and create a slip hazard. In practice, I chose a concrete or a heavy duty sealed surface, then added a gentle gradient of about 1/4 inch per foot toward a recessed drain. If you prefer softer underfoot, a thick poured concrete with a textured finish minimizes slips and gives you a durable base you can power wash after a heavy use weekend. For families with concerns about tripping on edges, an integrated curb or a micro lip around the border helps define the space while keeping the edges smooth for little feet. It’s not glamorous, but it’s the kind of practical detail that makes maintenance easier and days safer.
The next element is water delivery. The simplest path is a home irrigation pump paired with a loop of PVC piping hidden beneath the surface. The typical setup uses a small submersible pump in a reservoir under the pad, drawing water from a modest holding tank or a drain that feeds back into the system. The pipe network then routes to a handful of spray nozzles, decorative bubblers, a low-pressure sprinkler style array, and perhaps a whisper quiet jet stream that you can customize. The plumbing must be rated for outdoor use, and you should plan for a backflow preventer to keep the drinking water supply clean. When I first built a pad, I learned the hard way that skipping backflow prevention invites trouble with your shutoff valves and your local codes. It’s a small thing that saves big headaches later.
Lighting adds a subtle layer of magic as dusk settles in and the kids refuse to quit. String lights, low voltage LED strips embedded into the edge, or submerged lights in a shallow pool can transform the pad into a nighttime oasis without turning the yard into a carnival. The trick is to keep lighting practical and durable. Water and electrical connections demand careful layout and protection. In one project I ran a conduit along the outer wall to feed a simple switch box that controls both pump and lights. It reduces the tangled mess of cords and makes summer evenings more approachable.
One of the most powerful design moves is to treat the splash pad as a slice of an urban water park rather than a single feature. A good approach is to create zones that invite different kinds of play. One zone might be a narrow channel where water runs in a tiny stream, nudging stones along the bed as kids stomp and splash. Another zone could be a shallow basin with a soft, rounded edge that children can sit on while the water laps at their legs. A third zone can be a spray array where water bursts from small nozzles at random intervals, providing an ever changing pattern for children to chase. The more distinct the zones, the more kids can explore without getting in each other’s way, and the more you protect the lawn from relentless trampling in a single area.
If you design with kids at the center, you’ll craft a space that remains interesting year after year. For toddlers, a sensory garden could feed curiosity with gentle mist and a ground spray that nudges their toes. For older children, a winding channel with stepping stones invites a game of tag while staying mindful of the surface’s temperature in the heat of the day. And for adults, a well placed bench and shade canopy provide a restful vantage point, a place to supervise without losing sight of the action. The best splash pads feel like a natural extension of the yard rather than a separate contraption. The more it sits within the landscape, the more it stays usable and loved.
In practice, the equipment you select also defines what you can achieve. A modest budget can still yield a surprisingly robust pad if you choose components purposefully. For example, a small loop pump that runs on a timer can deliver a steady spray for several hours with minimal noise. A handful of spray nozzles, a set of adjustable micro jets, and a couple of bubbler features can transform a flat surface into a dynamic play field. If your budget is more generous, you can add features like a narrow water channel lined with smooth river stones, a shallow splash pool with a gentle edge that doubles as seating, or a few larger spray towers that create a dramatic spray cone on hot days. The key is to automate as much as possible so you don’t spend the day fiddling with valves. A well placed timer lets you schedule a few hours of play and then shut off before the clock runs away from you.
Safety is a constant companion in any outdoor project. The pad should be slip resistant, and the surface texture matters a lot. A coarser finish can provide grip but may feel rough to bare feet. A smoother finish is more comfortable for kids but can be slick when wet. In our builds we balanced these concerns by selecting a texture grade that offers grip when wet but remains gentle on skin. For older kids who want to sling water, a non skid edge is essential. We also pay attention to sun exposure on the materials themselves. Dark surfaces absorb more heat and can become uncomfortable to stand on. We have found that light or neutral tones keep the surface more bearable and reduce heat on hot afternoons. For play safety, a shallow water depth is crucial. A pad around 1 to 2 inches deep is ideal for little ones while still delivering the sensory and play value that makes the space feel like a water park.
Maintenance might sound like a chore, but with a few steady habits it becomes almost invisible. The filter in the reservoir should be checked weekly during heavy usage months. A quick drain and rinse every two weeks keeps mineral buildup from becoming a problem. If you have a lot of mineral rich water, you may want a small additive filter that helps prevent calcium scale on spray jets. The more you centralize the control, the easier it is to manage. A single battery operated timer or a compact smart controller can let you set the pump on a schedule that aligns with your family’s routines. We have found that a mid day run is worth pairing with a light power wash in late afternoon to remove sunscreen and chlorine residues that can accumulate on nozzle heads. It’s simple, but leaving small residues unchecked over weeks can reduce spray intensity and shorten component life.
Now a quick walk through two workable layout concepts that align with common backyards. The first is a linear approach. A long, narrow pad runs along a fence or the edge of the yard, with zones arranged in a sequence. The flow begins with a gentle mist near the entry, then slides into a shallow basin where kids can wade, and ends with a spray array that sends misty arcs outward. The advantage is clear sight lines and easy maintenance. The driveway style layout keeps hoses and electrical runs compact, which reduces the chance of tripping and makes it easier to hide equipment beneath a low deck or in an adjacent shed.
The second concept is a courtyard or island layout. In a smaller space, you carve a central pad with a surrounding ring of planters and seating that define the space. The water loops in a tight circle with jets that create bursts in the middle. You’ll enjoy a more intimate feel, which is ideal if you want a social hub around the water and a place to gather as a family or a group of visiting cousins. You may not have a full acres worth of yard in this scenario, but you can still achieve a sense of grandeur by designing the water features with scale in mind. A few tall spray towers set against a backdrop of greenery can look surprisingly expansive, and the soft curvature of the pad edges reduces the angular, industrial feel of a typical mechanical installation.
Part of the joy of a DIY splash pad is that it invites creative problem solving. If you have an uneven yard, you can still realize the dream by leveling a small pad on a concrete slab or by building a raised platform using pressure treated lumber and a weather resistant surface. The trick is to tie the raised area into the rest of the yard by repeating materials, such as a painted deck edge or a matching trim board. You can also incorporate a seasonal play space by using removable stepping stones that can be rearranged when guests arrive. The more flexible your approach, the easier it is to adapt the space to different ages and different kinds of water play. I have found that families who shift their configurations every season see higher engagement because the space feels new again, even if the core footprint remains the same.
As you think through the design, two practical constraints are always present: water usage and power. A splash pad is efficient when you keep the water recirculating and reuse back into a reservoir, but you still burn energy running the pump. There is a sweet spot where the pump size, nozzle count, and spray intensity align with your family’s rhythm. In our case, we used a pump rated for roughly 500 to 800 gallons per hour and a handful of nozzles that collectively deliver a gentle to moderate spray. On those long, hot weekends, the system runs for two or three hours at a time, with a two hour break in between for rest. It’s enough to keep the space lively without turning the yard into a constant water feature. If your plan is to run longer or more intensely, you’ll likely need a larger pump, additional filtration, and perhaps a separate irrigation zone to separate the pad from other watering tasks around the garden.
To bring these ideas into a practical build, a few concrete steps help keep the project organized. First, map out your space and measure carefully. Draw a simple plan on graph paper or in a design app, marking where the pad will sit, where the drain will be and where the pump will live. A clean plan speeds up ordering and eliminates miscommunications when you buy parts from multiple vendors. Second, select a surface that matches your climate and usage. If you live in a place with heavy rain, you’ll want surfaces that shed water quickly and resist mold. If your area sways between freezing and thawing, you will want materials that tolerate freeze-thaw cycles. Third, assemble the plumbing around a central hub. A robust hub reduces the number of long runs and minimizes the potential leak points. Fourth, test the system with water before finishing the surrounding space. Run it for a few hours, look for drips, check the drain rate, and ensure the spray coverage is even. It’s far easier to fix issues at this stage than after you’ve potted the borders and installed the landscaping.
A note on aesthetics and personality. The splash pad should mirror your home’s architecture and your family’s taste. If your house leans mid century modern, keep the lines clean and the edges soft rather than aggressively geometric. If your yard is rustic, you might enrich the space with natural stone accents around the drain and a wood framed edge to the pad. In our own work we tended to choose neutral tones for the pad and then bring color through accessories—buckets, signs, a few bright foam toys—so the space can evolve with the seasons without becoming visually heavy. You’ll find that the most-loved spaces are those that feel integrated with the landscape rather than isolated by a fence or a deck.
Two short, practical lists will help you focus on critical decisions without losing the texture of the project. The first list covers essential materials and equipment. The second offers quick safety and maintenance reminders.
Materials and equipment to gather
- A water pump suitable for outdoor use, sized to deliver the desired spray coverage A backflow preventer and outdoor rated piping, plus fittings for a ring of spray nozzles A water reservoir or holding tank if you plan to recirculate A few spray jets, bubblers, and a gentle mist nozzle set A durable, slip resistant surface material with a gentle texture for the pad
Safety and maintenance reminders
- A sturdy ground cover or border to prevent trips and to provide a clear edge A simple timer or smart controller to manage run times A routine for cleaning and filtering to prevent mineral buildup Regular checks for leaks around joints and drains A plan for shade and cooling during peak sun hours to protect kids
If you want a deeper dive into how these pieces come together, think about the pairings that suit your space. For a modest yard with a long fence line, consider a linear design with a narrow spray channel and a shallow basin at the far end. It creates the impression of a larger water feature without the cost of a big pit or pool. If you are starting with a blank slate, the courtyard style gives you a sense of an intimate gathering space that still reads as a grand water play zone, especially when you add a couple of towers with layered spray and a soft underlighting scheme to illuminate the action for evening sessions.
From my experience, the most common missteps come from rushing the electrical work or trying to pull too many features into a single space at first. Start with a simple, well planned pad, ensure drainage works perfectly, then iterate. The system is more forgiving than you might fear if you build with modularity in mind. For example, you can upgrade nozzles gradually, add a mist feature later in the season, or replace a heavy jet array with a more subtle spray as the kids grow older. A splash pad that adapts to your family’s life becomes a beloved fixture. It remains a space you want to visit on hot days, a place where a wave of laughter travels across the yard, and a reminder that a practical home improvement can become a cornerstone of family life.
I’ve watched friends and neighbors transform modest yards into real social hubs with a few careful steps. They started with a clear plan, a sense of the space’s limits, and a willingness to test and adapt. The payoff comes not just from the splash of water or the cheerful squeals but from the way the space anchors the daily rhythms of summer. A splash pad at home can do more than entertain; it can teach kids about water play, responsible use of resources, and the joy of gathering around a shared, interactive surface. When you see a child lean into a spray arc and laugh at the surprise, you realize that the investment has delivered something more than a water feature. It becomes a memory, a place where the fastest days of summer become the easiest days to savor.
For the curious reader who wants a quick mental model before you start sketching, imagine three layers working in harmony. The surface layer handles the physical contact, the water layer provides movement and play, and the control layer governs timing and safety. The surface is your deck, the basin, the edge, and the texture. The water layer is the array of jets, the channel, the mist, and any bubbling features. The control layer is the timer, the pump, and the backflow preventer. If you can think in those terms, you can design with clarity rather than confusion. You’ll create a pad that feels intentional and complete rather than a mix of gadgets tossed into a space.
As you move from concept to construction, you’ll begin to see the space come alive. You’ll watch the kids discover patterns in the spray, test the resistance of stones along a channel, and chase the wind that carries a fine mist across the yard. You’ll observe how the shade shifts across the pad as the sun moves, how the water catches light in a thousand tiny prisms, how the laughter flows through the garden like a soft, refreshing breeze. These are not abstract observations; they are the practical rewards of thoughtful design, careful planning, and patient work. A grand backyard water park does not require a full commercial install. It requires a sturdy plan, reliable equipment, and the willingness to learn by doing, step by step, with the people you care about.
If you’re weighing the DIY route against hiring a contractor, there are a few decision points that matter. A DIY approach gives you control over the details, the sense of ownership, and the flexibility to tailor the project to your budget. It also carries a learning curve and a time investment. A contractor can accelerate the process and bring a professional finish, but you may end up paying a premium for the convenience. In my last build, I started with a solid plan, sourced components carefully, and then brought in a contractor for the electrical and edge finishing. The collaboration saved a lot of back and forth, and the outcome looked polished without losing the personal touch.
As with any long project, you’ll benefit from talking with neighbors who’ve done similar work, visiting a few local showrooms to see components in person, and reading up on local codes before you commit. The codes are not mere bureaucratic hurdles; they protect your home and your family. If you take the time to review them early, you avoid expensive redesigns later on. A well documented plan that reflects your local health and safety requirements is the most durable insurance you can have.
In closing, a grand backyard water park is not a fantasy that only exists in commercial spaces. It is a practical, liquid, and living feature that can grow with your family. It invites lighter days and longer evenings, laughter that travels across the yard, and a sense of shared adventure that the whole household can claim as their own. When you design with care, the pad becomes a canvas for summer life in your own home. The water you circulate, the kids you watch play, and the landscape you protect all come together to form something that is more than the sum of its parts.
If you’re ready to start turning ideas into action, keep these guiding principles in mind. Start with a simple footprint that fits your space and budget, then let the design evolve as you learn what your kids love most about splash play. Use zones to create rhythm in play, rather than a single, large, undifferentiated area. And remember that maintenance is a feature, not a chore—build it into your schedule so the pad remains vibrant year after year. With those principles in hand, you can craft a DIY water park at home that is big on memory, not on complexity.
46 Zorn Blvd suite a, Yaphank, NY 11980 United States